# 换源、更新
sudo pacman-mirrors -i -c China -m rank
在弹出来的框里选择一个即可。
然后添加 ArchlinuxCN 源。
sudo nano /etc/pacman.conf
在最后加上三行,然后保存。
[archlinuxcn]
Server = https://mirrors.tuna.tsinghua.edu.cn/archlinuxcn/$arch
SigLevel = Optional TrustAll
然后拉取完整的数据库,顺便更新现有的包。
sudo pacman -Syyu
# 安装软件
# 安装基础软件
sudo pacman -S --needed \
    base-devel \
    gnome-keyring \
    binutils \
    archlinuxcn-keyring \
    micro \
    zip \
    unzip \
    yay
安装 base-devel 时可能需要选择,直接回车,全选就 ok。
# 安装 docker
sudo pacman -S docker
为 docker 加入阿里源:
sudo wget -o /etc/docker/daemon.json https://blog.lyh543.cn/mirrors/docker.json
sudo systemctl enable docker.service
sudo systemctl start docker.service
配置 docker 不需要 sudo:
sudo groupadd docker
sudo usermod -aG docker $USER
newgrp docker   # log in to docker group
docker ps       # 验证更改成功
# 安装常用软件
接下来使用 yay 代替 pacman。yay 完全兼容 pacman 的语法和仓库,且额外支持 AUR (opens new window) 库,这个仓库有常用、但非官方的软件(如 QQ、网易云、Chrome 等)。
为 yay 的 AUR 换清华源:
yay --aururl "https://aur.tuna.tsinghua.edu.cn" --save
安装常用应用(注意,yay 不推荐使用 sudo,而是会在命令执行时申请管理员密码):
yay -S --needed \
    netease-cloud-music \
    com.qq.tim.spark \
    wemeet-bin \
    google-chrome \
    xrdp
这里用 mailspring 替代自带的 thunderbird,用 google-chrome 替代自带的 firefox。
yay -Rs thunderbird firefox
# 安装常见字体和搜狗拼音输入法
yay -S --needed \
    adobe-source-han-sans-otc-fonts \
    adobe-source-han-serif-otc-fonts \
    consolas-font
yay -S --needed \
    fcitx \
    fcitx-sougoupinyin \
    fcitx-im \
    fcitx-configtool \
    fcitx-qt5 \
    kcm-fcitx
然后在 /etc/profile 追加:
export BROWSER=/opt/google/chrome/chrome
export GTK_IM_MODULE=fcitx
export QT_IM_MODULE=fcitx
export XMODIFIERS=@im=fcitx
然后注销、登录。
在程序启动器搜索并打开“fcitx 配置”,设置“搜狗输入法个人版”为仅有的输入法,如下:
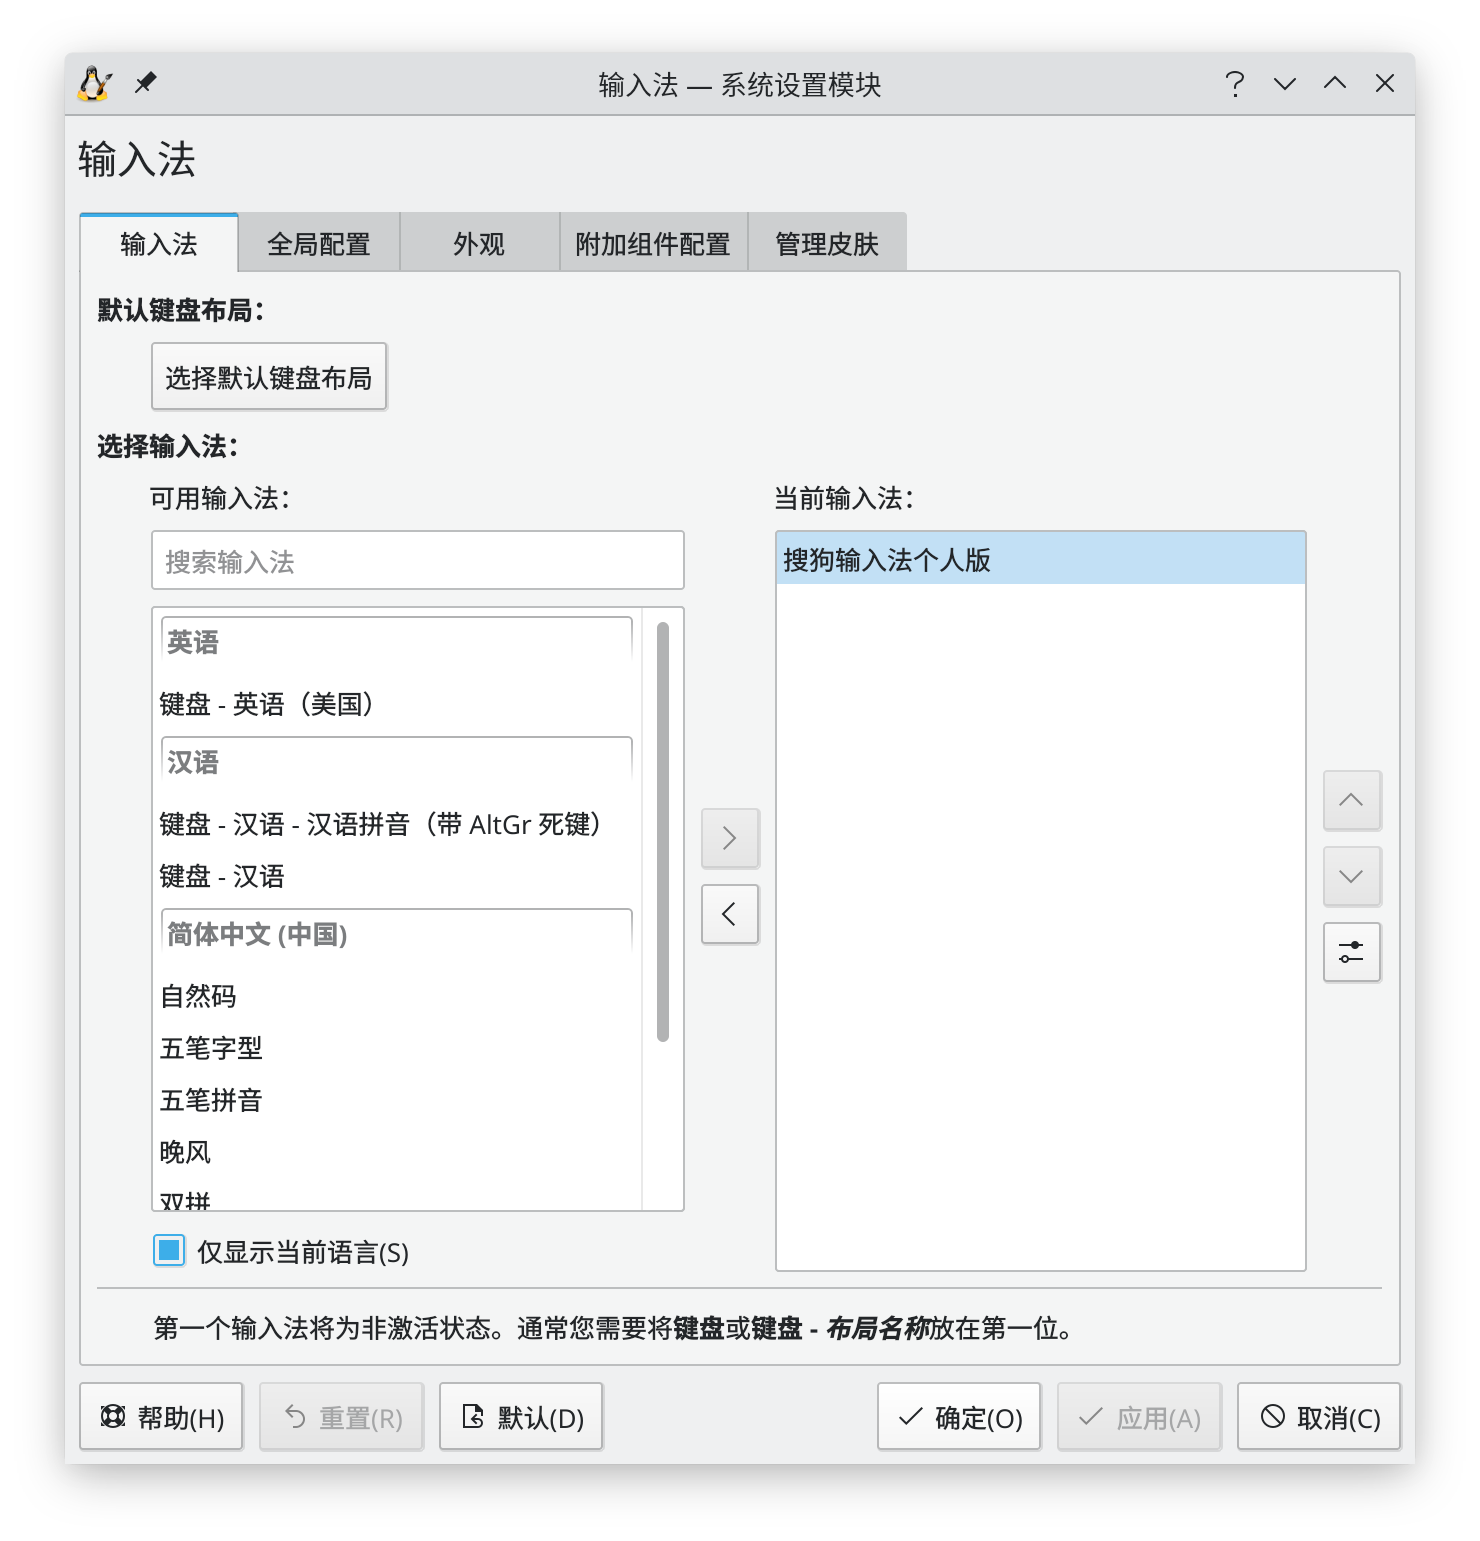
然后就可以获得和 Ubuntu 下相同的搜狗拼音输入法的体验。
# 安装 v2ray
关于 V2Ray GUI 客户端,可以选择基于 Qt 的 Qv2ray,或是基于 Web UI 的 V2RayA。个人目前使用 Qv2ray。
安装 Qv2ray:
sudo pacman -S v2ray qv2ray --needed
关闭自启 v2ray:
sudo systemctl stop v2ray
sudo systemctl disable v2ray
然后配置 qv2ray。配置好以后记得修改系统设置代理端口,然后在 .zshrc 追加(端口看你的配置):
export HTTP_PROXY="http://localhost:17296"
export HTTPS_PROXY="http://localhost:17296"
或者安装 V2RayA(透明代理,管理页面在 localhost:2017):
docker run -d \
    --restart=always \
    --privileged \
    --network=host \
    --name v2raya \
    -v /etc/resolv.conf:/etc/resolv.conf \
    -v /etc/v2raya:/etc/v2raya \
    mzz2017/v2raya
# 安装开发工具
# 安装 VS Code 和 JetBrains 全家桶
yay -S --needed \
    jetbrains-toolbox
    visual-studio-code-bin

jetbrains-toolbox &
在下面 yay 的同时,可以同时安装 JB 全家桶。
# 配置开发环境
yay -S --needed \
    make \
    cmake \
    clang \
    jdk-openjdk \
    openjdk-src \
    maven \
    go \
    npm \
    adb \
    git-lfs \
    gnome-keyring \
    flutter
配置 pip、npm 和 maven 的镜像源:
pip3 config set global.index-url http://pypi.doubanio.com/simple
pip3 config set global.trusted-host pypi.doubanio.com

sudo npm install -g yarn pnpm mirror-config-china --registry=https://registry.npm.taobao.org
cd ~ && mirror-config-china --registry=https://registry.npm.taobao.org

mkdir ~/.m2 && wget -O ~/.m2/settings.xml https://blog.lyh543.cn/mirrors/maven.xml
添加 yarn 环境变量:
export PATH="$(yarn global bin):$PATH"
# 配置个人 SSH 密钥
略。
以及配置 SSH 走代理:macOS 给 Git(Github) 设置代理(HTTP/SSH) · GitHub (opens new window)
# (个人用)开发工具
mkdir ~/git
cd ~/git
git clone git@github.com:lyh543/dev-tools.git
chmod a+x -R dev-tools
追加环境变量到 ~/.zshrc:
if [ -d "/home/liu/git/dev-tools" ] ; then
  PATH="$PATH:/home/liu/git/dev-tools"
fi
# 日常记录
# 修复 Windows 和 Linux 双系统时间不同步
参考:怎样解决Windows10时间快和Ubuntu时间差问题? - 滑稽的回答 - 知乎 (opens new window)
这里采用修改 Linux 的方案:
sudo timedatectl set-local-rtc 1 --adjust-system-clock
# 安装 texlive 和 texstudio
需要说明的是,texlive 此类工具,由于字体兼容性问题,在 Linux 和 Win 上编译很有可能不同极力,不推荐跨系统协作。如果不考虑字体,或者只在 Linux 上编写(不过你用的 LaTeX 模板作者可能也是 Win 用户),就不用考虑此类问题。
Tl;dr
wget https://mirrors.tuna.tsinghua.edu.cn/CTAN/systems/texlive/tlnet/install-tl-unx.tar.gz
tar -xzf install-tl-unx.tar.gz
cd install-tl-*
sudo ./install-tl -repository https://mirrors.tuna.tsinghua.edu.cn/CTAN/systems/texlive/tlnet/

sudo cp /usr/local/texlive/20*/texmf-var/fonts/conf/texlive-fontconfig.conf /etc/fonts/conf.d/09-texlive.conf
sudo fc-cache -fv

yay -S --needed \
    ttf-ms-fonts \ # 选默认即可
    texstudio
最后添加环境变量:
export PATH=/usr/local/texlive/2021/bin/x86_64-linux:$PATH
AUR 的 texlive 如果缺了包,没法直接用 tlmgr 更新,替代方法也是各种不爽。还是手动安装吧。
https://stone-zeng.github.io/2018-05-13-install-texlive-ubuntu/
对了,最好还要安装一下 Windows 上的英文字体,不然某些在 Windows 上开发的 LaTeX 模板没法编译。
yay -S ttf-ms-fonts # 选默认即可
中文字体需要从 Windows 镜像中提取,这个就比较麻烦了。而且安装好以后,LaTeX 字体还是有点问题。
# 安装 Cascadia Code
curl -o CascadiaCode.zip https://github.com/microsoft/cascadia-code/releases/download/v2108.26/CascadiaCode-2108.26.zip
unzip CascadiaCode.zip -d CascadiaCode
sudo cp CascadiaCode/ttf/*.ttf /usr/share/fonts/TTF
fc-cache -fv
# 安装 TigerVNC
yay -S tigervnc

# 生成密码
vncpassword

# 启动 server
x0vncserver -rfbauth ~/.vnc/passwd &

# 每次开启桌面时启动
echo >> ~/.xprofile "x0vncserver -rfbauth ~/.vnc/passwd &"

# client
vncviewer