# 编者按
本节转载自: Spring Boot教程第10篇:restdoc - 方志朋的博客 (opens new window) Spring Boot教程第11篇:swagger2 - 方志朋的博客 (opens new window) 给Swagger升级了新版本,没想到居然有这么多坑! - Document (opens new window)
一个 API 最好要有面向使用者的文档,因为 API 就是给其他开发者调用的,这是 API 开发和其他应用开发不同的地方。
API 文档生成器的作用就在于,代码和文档是绑定的,更新代码而忘记更新文档的情形会减少很多。
Spring Boot REST API 项目常用的 API 文档有两种:
- Spring REST Docs (opens new window):基于测试的文档生成器。需要编写测试样例,测试运行的同时会生成
adoc格式的测试输入与输出,然后编写文档模板,文档就可以嵌入测试的输入和输出。 - Swagger 2 (opens new window):在 Controller 中添加说明程序功能的注解,Swagger 就可以自动生成 API 文档页面。

# Spring REST Docs
# 创建工程
引入依赖,其pom文件:
<dependencies>
		<dependency>
			<groupId>org.springframework.boot</groupId>
			<artifactId>spring-boot-starter-web</artifactId>
		</dependency>

		<dependency>
			<groupId>org.springframework.boot</groupId>
			<artifactId>spring-boot-starter-test</artifactId>
			<scope>test</scope>
		</dependency>

		<dependency>
			<groupId>org.springframework.restdocs</groupId>
			<artifactId>spring-restdocs-mockmvc</artifactId>
			<scope>test</scope>
		</dependency>
	</dependencies>
通过@SpringBootApplication,开启springboot:
@SpringBootApplication
public class Application {

    public static void main(String[] args) {
        SpringApplication.run(Application.class, args);
    }
}
在springboot通常创建一个controller:
@RestController
public class HomeController {

    @GetMapping("/")
    public Map<String, Object> greeting() {
        return Collections.singletonMap("message", "Hello World");
    }

}
启动工程,访问localhost:8080,浏览器显示:
{“message”:”Hello World”}
证明接口已经写好了,但是如何通过restdoc生存api文档呢
# 通过单元测试生成api文档
restdocs是通过单元测试生存snippets文件,然后snippets根据插件生成htm文档的。
建一个单元测试类:
@RunWith(SpringRunner.class)
@WebMvcTest(HomeController.class)
@AutoConfigureRestDocs(outputDir = "target/snippets")
public class WebLayerTest {

    @Autowired
    private MockMvc mockMvc;

    @Test
    public void shouldReturnDefaultMessage() throws Exception {
        this.mockMvc.perform(get("/")).andDo(print()).andExpect(status().isOk())
                .andExpect(content().string(containsString("Hello World")))
                .andDo(document("home"));
    }
}
其中,@AutoConfigureRestDocs注解开启了生成snippets文件,并指定了存放位置。
启动单元测试,测试通过,你会发现在target文件下生成了一个snippets文件夹,其目录结构如下:
└── target
    └── snippets
        └── home
            └── httpie-request.adoc
            └── curl-request.adoc
            └── http-request.adoc
            └── http-response.adoc
默认情况下,snippets是Asciidoctor格式的文件,包括request和reponse,另外其他两种httpie和curl两种流行的命令行的http请求模式。
到目前为止,只生成了Snippets文件,需要用Snippets文件生成文档。
# 怎么用Snippets
创建一个新文件src/main/asciidoc/index.adoc:
= 用 Spring REST Docs 构建文档

This is an example output for a service running at http://localhost:8080:

.request
include::{snippets}/home/http-request.adoc[]

.response
include::{snippets}/home/http-response.adoc[]
这个例子非常简单,通过单元测试和一些简单的配置就能够得到api文档了。
adoc的书写格式,参考:http://docs.spring.io/spring-restdocs/docs/current/reference/html5/,这里不多讲解。
需要使用asciidoctor-maven-plugin插件,在其pom文件加上:
<plugin>
    <groupId>org.asciidoctor</groupId>
    <artifactId>asciidoctor-maven-plugin</artifactId>
    <executions>
        <execution>
            <id>generate-docs</id>
            <phase>prepare-package</phase>
            <goals>
                <goal>process-asciidoc</goal>
            </goals>
            <configuration>
                <sourceDocumentName>index.adoc</sourceDocumentName>
                <backend>html</backend>
                <attributes>
                    <snippets>${project.build.directory}/snippets</snippets>
                </attributes>
            </configuration>
        </execution>
    </executions>
</plugin>
这时只需要通过mvnw package命令就可以生成文档了。 在/target/generated-docs下有个index.html,打开这个html,显示如下,界面还算简洁:
# 结语
通过单元测试,生存adoc文件,再用adoc文件生存html,只需要简单的几步就可以生成一个api文档的html文件,这个html文件你可以通网站发布出去。整个过程很简单,对代码无任何影响。
源码下载:https://github.com/forezp/SpringBootLearning
# 参考资料
- https://spring.io/guides/gs/testing-restdocs/
- http://docs.spring.io/spring-restdocs/docs/current/reference/html5/
# Swagger 2
swagger,中文“拽”的意思。它是一个功能强大的api框架,它的集成非常简单,不仅提供了在线文档的查阅,而且还提供了在线文档的测试。另外swagger很容易构建restful风格的api,简单优雅帅气,正如它的名字。
# 引入依赖
    <properties>
        <swagger2.version>2.9.2</swagger2.version>
    </properties>
    <dependencies>
        <!--Swagger-UI API文档生产工具-->
        <dependency>
            <groupId>io.springfox</groupId>
            <artifactId>springfox-swagger2</artifactId>
            <version>${swagger2.version}</version>
        </dependency>
        <dependency>
            <groupId>io.springfox</groupId>
            <artifactId>springfox-swagger-ui</artifactId>
            <version>${swagger2.version}</version>
        </dependency>
    </dependencies>
# 写配置类
@Configuration
@EnableSwagger2
public class Swagger2 {

    @Bean
    public Docket createRestApi() {
        return new Docket(DocumentationType.SWAGGER_2)
                .apiInfo(apiInfo())
                .select()
                .apis(RequestHandlerSelectors.basePackage("com.forezp.controller"))
                .paths(PathSelectors.any())
                .build();
    }
    private ApiInfo apiInfo() {
        return new ApiInfoBuilder()
                .title("springboot利用swagger构建api文档")
                .description("简单优雅的restfun风格,http://blog.csdn.net/forezp")
                .termsOfServiceUrl("http://blog.csdn.net/forezp")
                .version("1.0")
                .build();
    }
}
通过@Configuration注解,表明它是一个配置类,@EnableSwagger2开启swagger2。apiINfo()配置一些基本的信息。apis()指定扫描的包会生成文档。
# 写生产文档的注解
swagger通过注解表明该接口会生成文档,包括接口名、请求方法、参数、返回信息的等等。
@Api:修饰整个类,描述Controller的作用@ApiOperation:描述一个类的一个方法,或者说一个接口@ApiParam:单个参数描述@ApiModel:用对象来接收参数@ApiProperty:用对象接收参数时,描述对象的一个字段@ApiResponse:HTTP响应其中1个描述@ApiResponses:HTTP响应整体描述@ApiIgnore:使用该注解忽略这个API@ApiError:发生错误返回的信息@ApiParamImplicitL:一个请求参数@ApiParamsImplicit多个请求参数
现在通过一个栗子来说明:
package com.forezp.controller;

import com.forezp.entity.Book;
import io.swagger.annotations.ApiImplicitParam;
import io.swagger.annotations.ApiImplicitParams;
import io.swagger.annotations.ApiOperation;
import org.springframework.ui.ModelMap;
import org.springframework.web.bind.annotation.*;
import springfox.documentation.annotations.ApiIgnore;

import java.util.*;

/**
 * 用户创建某本图书	POST	/books/
 * 用户修改对某本图书	PUT	/books/:id/
 * 用户删除对某本图书	DELETE	/books/:id/
 * 用户获取所有的图书 GET /books
 *  用户获取某一图书  GET /Books/:id
 * Created by fangzhipeng on 2017/4/17.
 * 官方文档:http://swagger.io/docs/specification/api-host-and-base-path/
 */
@RestController
@RequestMapping(value = "/books")
public class BookContrller {

    Map<Long, Book> books = Collections.synchronizedMap(new HashMap<Long, Book>());

    @ApiOperation(value="获取图书列表", notes="获取图书列表")
    @RequestMapping(value={""}, method= RequestMethod.GET)
    public List<Book> getBook() {
        List<Book> book = new ArrayList<>(books.values());
        return book;
    }

    @ApiOperation(value="创建图书", notes="创建图书")
    @ApiImplicitParam(name = "book", value = "图书详细实体", required = true, dataType = "Book")
    @RequestMapping(value="", method=RequestMethod.POST)
    public String postBook(@RequestBody Book book) {
        books.put(book.getId(), book);
        return "success";
    }
    @ApiOperation(value="获图书细信息", notes="根据url的id来获取详细信息")
    @ApiImplicitParam(name = "id", value = "ID", required = true, dataType = "Long",paramType = "path")
    @RequestMapping(value="/{id}", method=RequestMethod.GET)
    public Book getBook(@PathVariable Long id) {
        return books.get(id);
    }

    @ApiOperation(value="更新信息", notes="根据url的id来指定更新图书信息")
    @ApiImplicitParams({
            @ApiImplicitParam(name = "id", value = "图书ID", required = true, dataType = "Long",paramType = "path"),
            @ApiImplicitParam(name = "book", value = "图书实体book", required = true, dataType = "Book")
    })
    @RequestMapping(value="/{id}", method= RequestMethod.PUT)
    public String putUser(@PathVariable Long id, @RequestBody Book book) {
        Book book1 = books.get(id);
        book1.setName(book.getName());
        book1.setPrice(book.getPrice());
        books.put(id, book1);
        return "success";
    }
    @ApiOperation(value="删除图书", notes="根据url的id来指定删除图书")
    @ApiImplicitParam(name = "id", value = "图书ID", required = true, dataType = "Long",paramType = "path")
    @RequestMapping(value="/{id}", method=RequestMethod.DELETE)
    public String deleteUser(@PathVariable Long id) {
        books.remove(id);
        return "success";
    }

    @ApiIgnore//使用该注解忽略这个API
    @RequestMapping(value = "/hi", method = RequestMethod.GET)
    public String  jsonTest() {
        return " hi you!";
    }
}
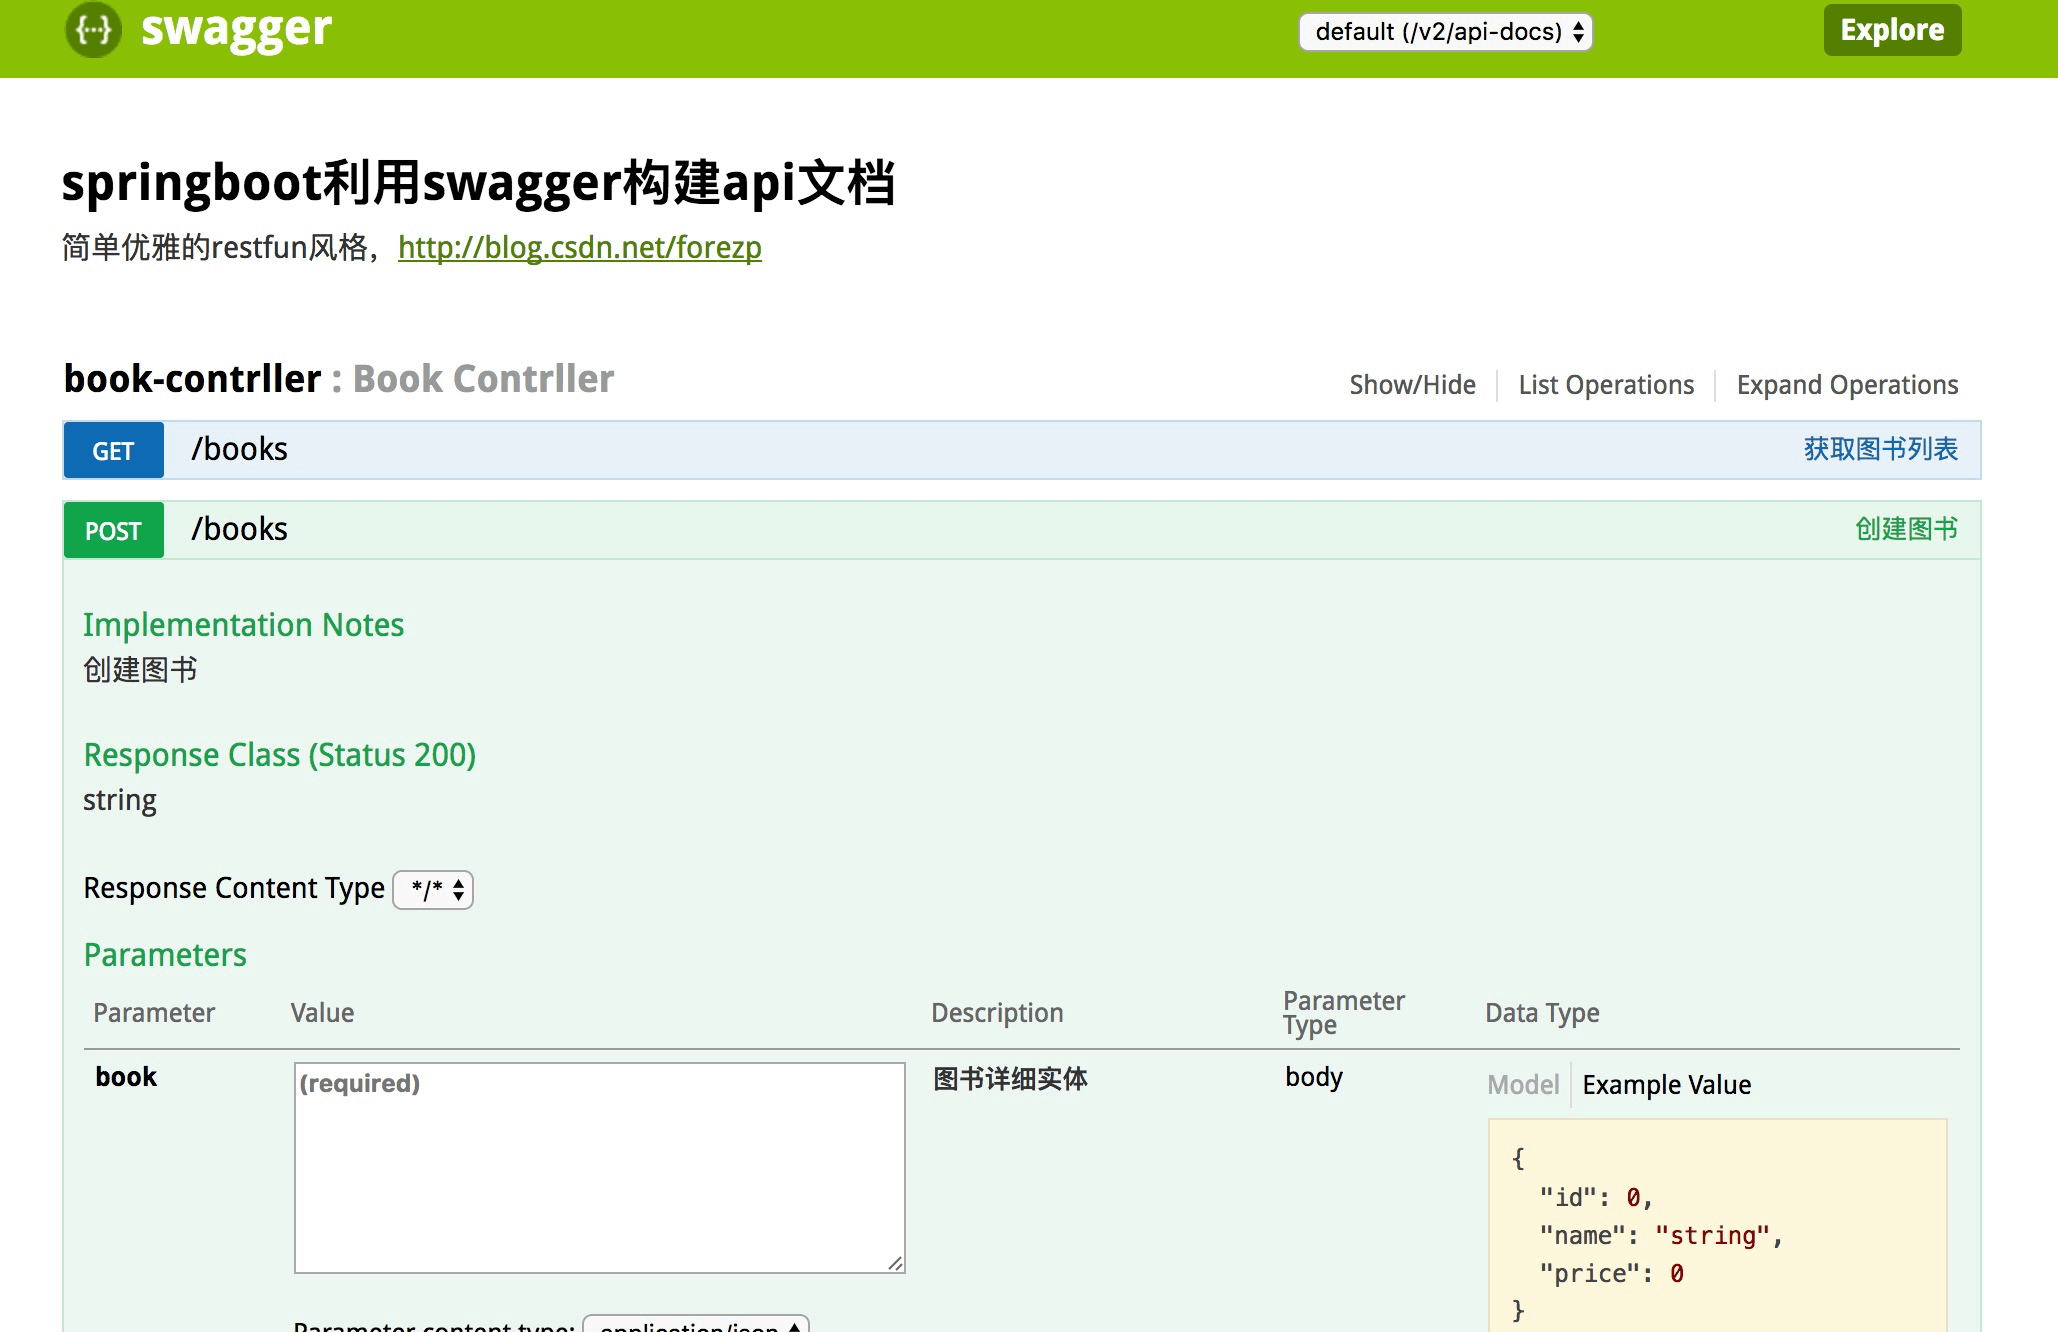
通过相关注解,就可以让swagger2生成相应的文档。如果你不需要某接口生成文档,只需要在加@ApiIgnore注解即可。需要说明的是,如果请求参数在url上,@ApiImplicitParam 上加paramType = “path”。
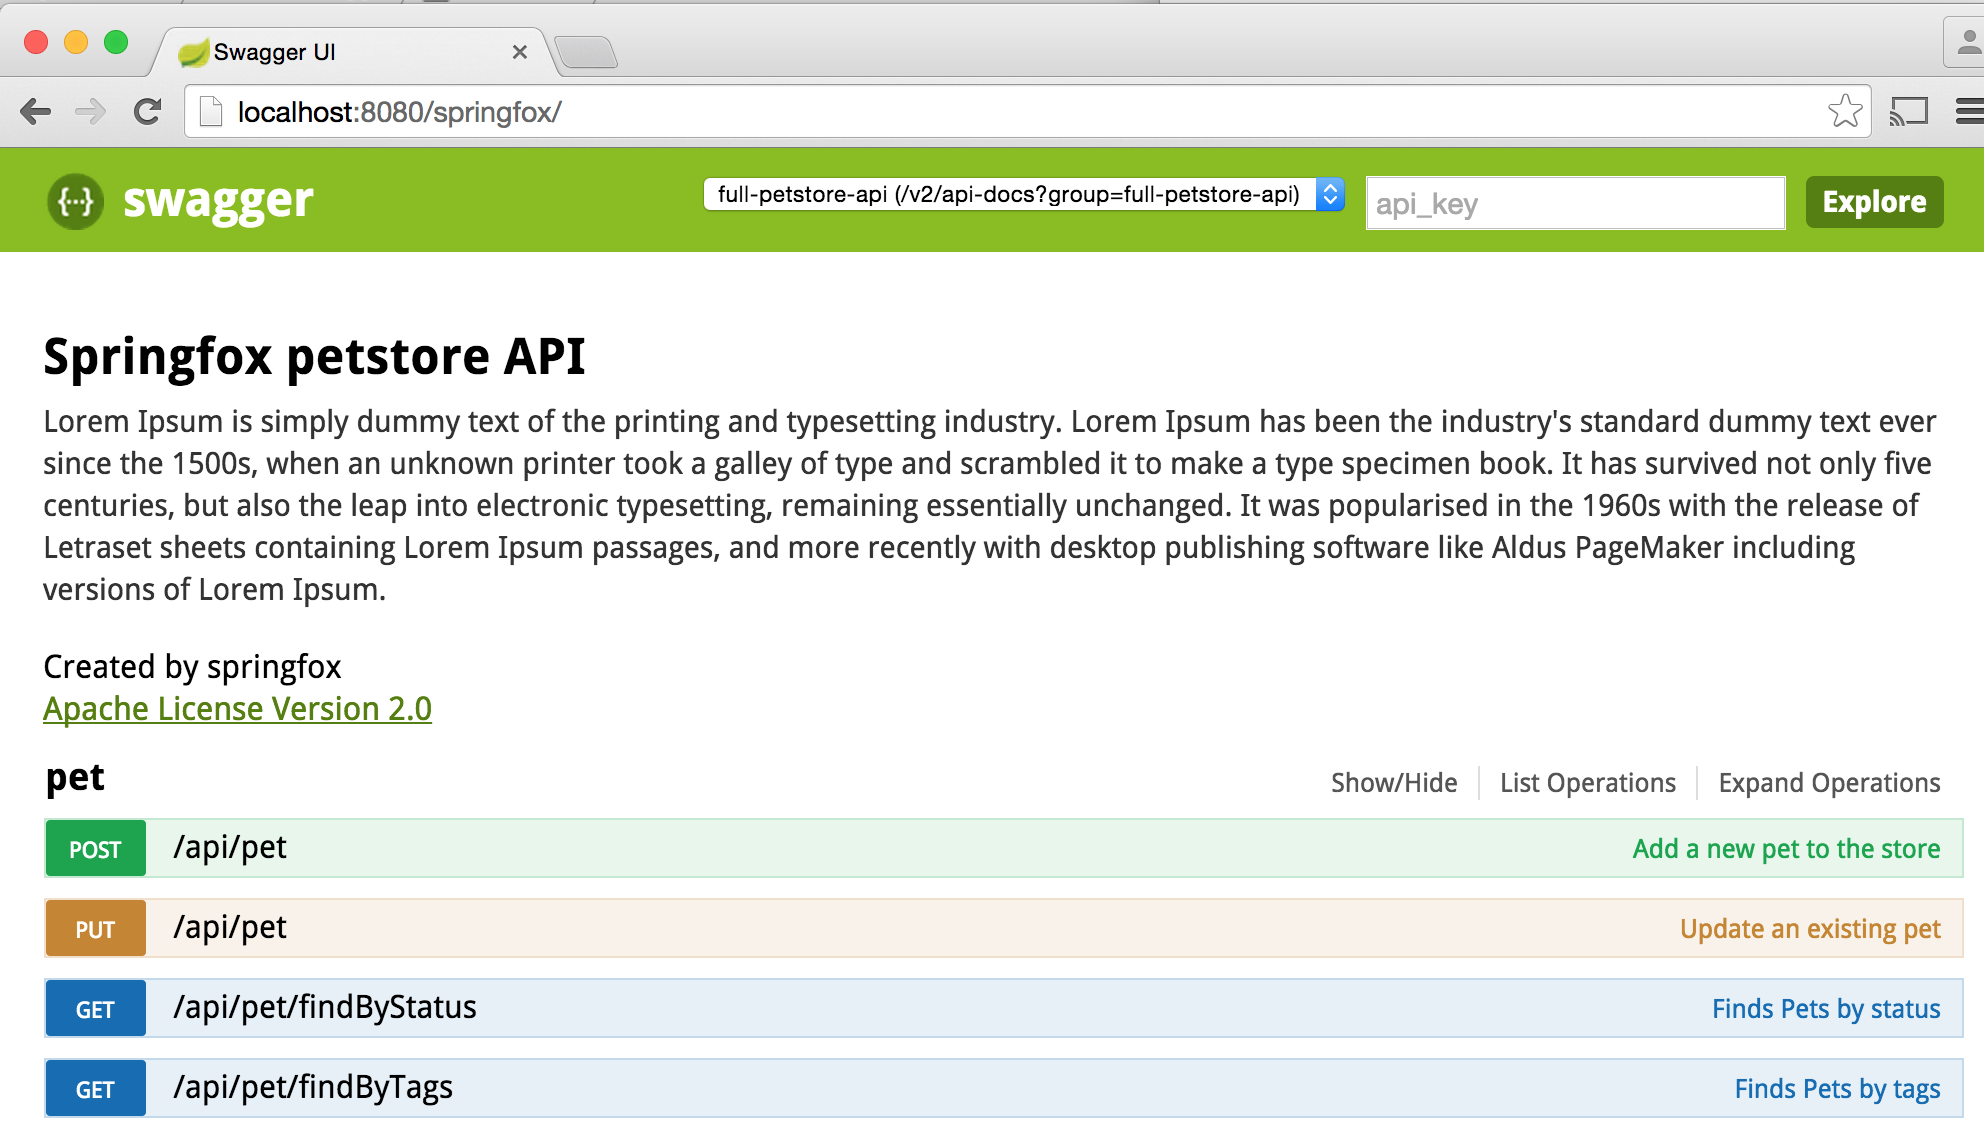
启动工程,访问:http://localhost:8080/swagger-ui.html ,就看到swagger-ui:
整个集成过程非常简单,但是我看了相关的资料,swagger 没有做安全方面的防护,可能需要我们自己做相关的工作。